Search This Blog

Monday, December 4, 2017

Web Address Trimming, Visual Instructions, and Seasonal Coding Lessons

In today's Tuesday Tech Tips, I'm going to show you some tools to boost your efficiency and help teach coding in a fun new way.

bit.ly: The Free Web Address Trimmer


bit.ly is a free to use URL trimmer that takes long, ugly website names and makes them tiny. URL stands for Uniform Resource Locator--the fancy name for a web address.

save image
This is the bit.ly interface. That fancy bar graph is a representation of how many times my appointment calendar has been clicked since July. Neat!

If you have a link you'd like to share a lot, you can provide it in a hyperlink (did you know you can do this by highlighting text and pressing CTRL+K?) or you can type out the address. For example, my appointment calendar is https://calendar.google.com/calendar/selfsched?sstoken=UURfZnZnb2JzSjdhfGRlZmF1bHR8NTk1NDM4YTlhNDkwODY1Y2MyODExYTEyODM2ZmJjMWM.

That's not useful.

I headed over to bit.ly and pressed Create Bitlink. I copy and pasted the long address inside, typed TroyDLS in the Customize field, and now I've got a short, easy-to-remember link: bit.ly/TroyDLS

Elegant. Timeless. Practical.

Important: If you type www. in front of your new site, it won't work! And it's case-sensitive, meaning students must get the capital letters correct.

Visual Instructions: Using Google Forms and Pictures to Visually Teach

Do you find that you teach the same thing over and over again? Do you have a neat classroom activity that requires a little bit of student setup? Can pictures and videos help save you time?

How'd he do that..?
Consider creating a Google Form with a required question for every step of the process, then provide one answer as a checkbox to confirm that they did it correctly. You can add a picture or a GIF (Graphics Interchange Format, pronounced with a hard "G" like "Google") to your instructions. You can find them online that demonstrate a process or you can create your own and share them to your Google Drive using an iOS or Android app like Giphy Cam.

In this example form, I ask one question and provide a GIF of how it's to be completed.

Students check off each box as they complete a step. The beauty of the GIF is that it allows for students to watch a step over and over until they get it right.

I created a Google Form with GIF instructions to help our schools use the Google Expeditions Kit. There is a teacher version and a student version. Students can work on their own or in groups with a Chromebook or you can project it so that everyone can follow the steps at the same time.

Seasonal Coding Lessons: The Google Santa Tracker for Educators

It's Computer Science Education Week! That means students all over the world are learning to code in fun, new ways. And what better way to learn than with Santa Claus hims-elf?

save image
Teaching elves to dance using code? Count me in!

The Google Santa Tracker is a great resource for kids Kindergarten through 10th grade (sorry, South Campus, your students probably know the truth by now) with Geography, Computer Science, Language, and Social Studies lesson plans. Learn to code by making elves dance! Learn about holiday traditions around the world with an interactive map! Learn to say Happy New Year in Chinese, German, or Elvish!

A new activity is added every day until Christmas, so explore and check back often!

If you have any questions on how to use any of these tools in your classroom, don't hesitate to contact your DLS.

Thanks for reading and we'll see you next week!

Troy

Tuesday, November 28, 2017

Google Drive File Stream and Organizing your Google Drive Using Images

Google Drive File Stream
We’re pleased to announce access to Drive File Stream. It is a new application for your Mac or PC that gives you access to all your Google Drive files from your computer while using less disk space and decreasing sync time. Smart Notebook files and all other files can be launched and accessed through Drive File Stream.
How does it work?
With Drive File Stream, you can:
  • Quickly see all your Google Drive files in Finder/Explorer.
  • Browse and organize Google Drive files without downloading all of them to your computer.
  • Choose which files or folders you would like to make available offline.
  • Open files in common apps like Microsoft Office and Adobe Photoshop.
  • Click here for step-by-step directions to start using Drive File Stream.

Organizing your Google Drive Using Images

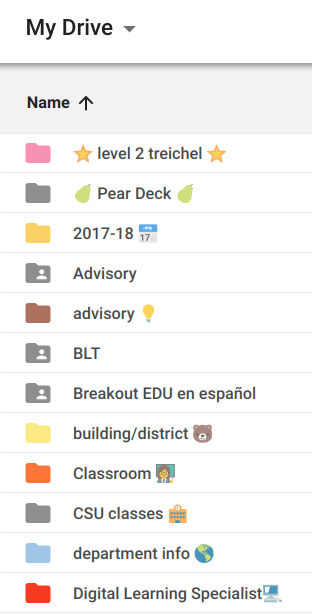
As your Google Drive starts to fill up, a fun and effective way to get organized is to use images and colors. Here are directions to add images to your folder names.


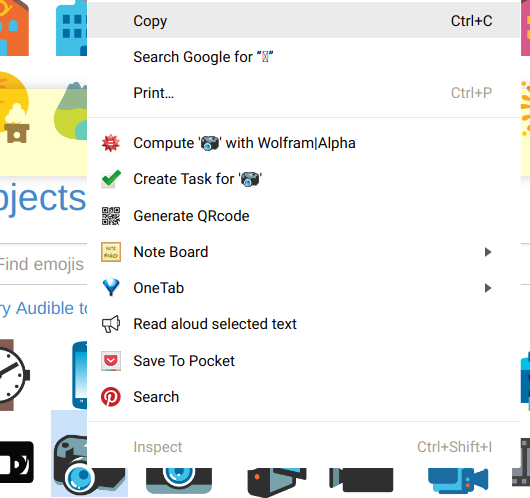
Step 1: Open one of these emoji sites.

Step 2: Find an emoji that will help you easily identify your folder. Copy that image.


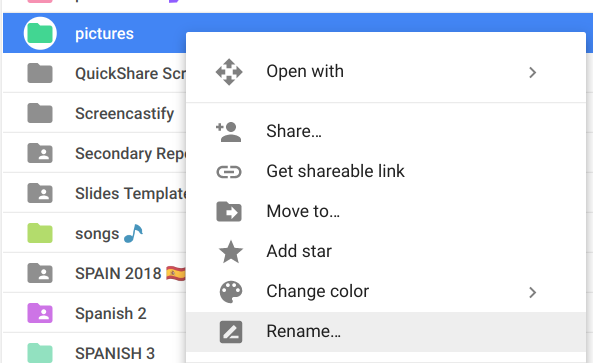
Step 3: Open your Google Drive. Right-click the folder and choose “rename”.

*This is the also the spot where you can change the color of your folder.
*A shortcut to rename folders is typing an N when you have the folder highlighted.


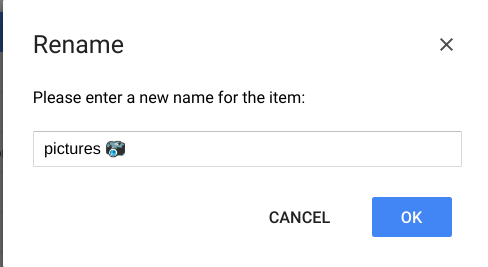
Step 4: Paste the saved image into the folder’s title.


A few notes about organization...
*adding an emoji at the beginning of a title will have an impact while sorting, but adding an emoji to the end will not
*if you have frequently accessed folders you could put the emoji in the front
*if you want to keep everything alphabetical then put the emoji in the back
*use colors to sort themes, chapters, teaching levels, etc.


Tuesday, November 7, 2017

2 Great Slides Add-Ons for Beautiful Presentations

We are often tasked with creating engaging displays of information or sets of instructions that can be followed visually. These Google Slides add-ons can help you do just that!


Noun Project Add-On
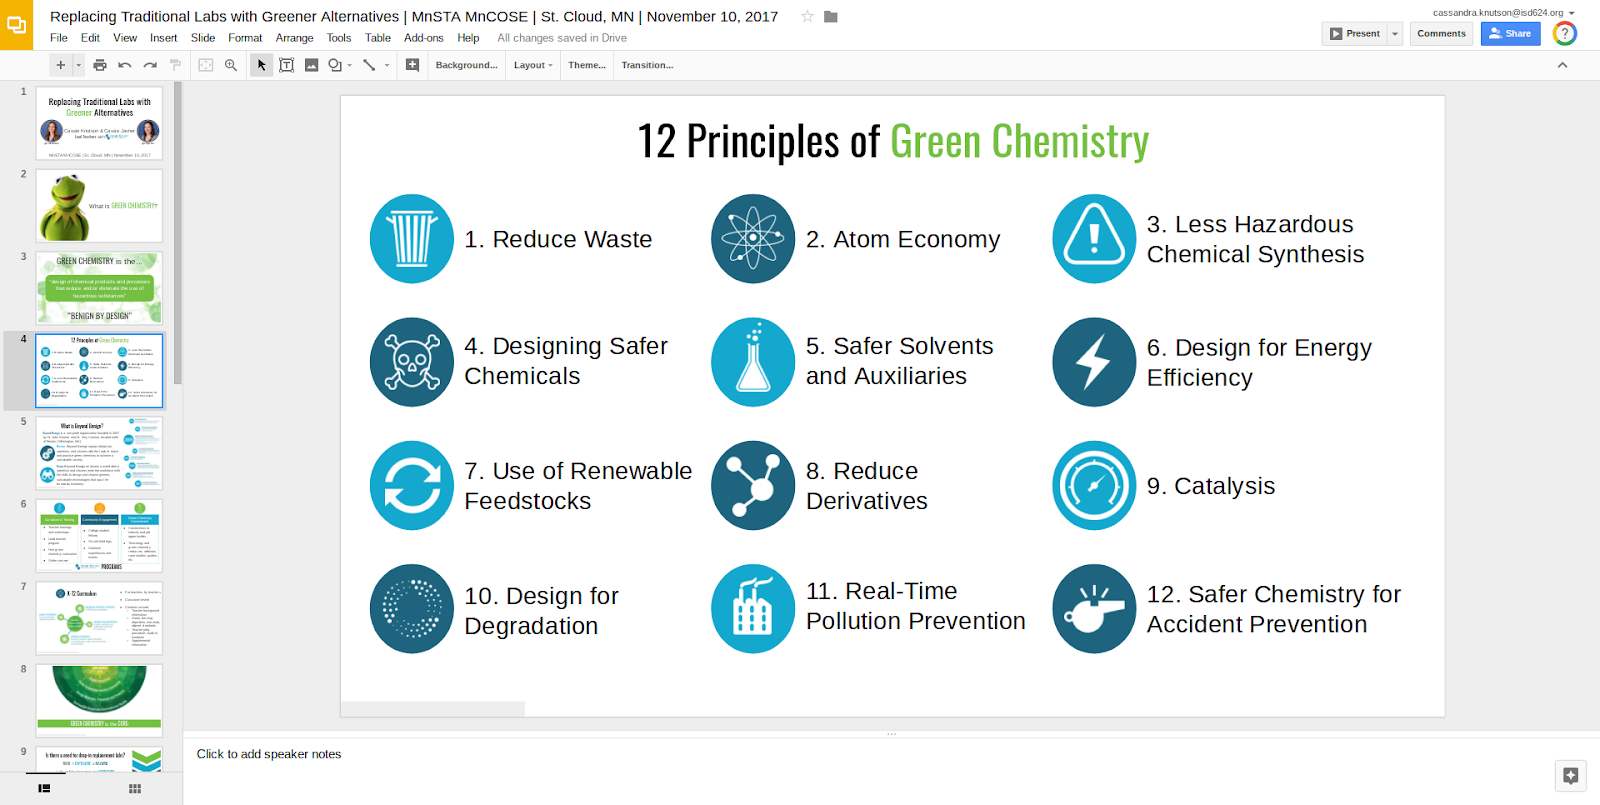
The Noun Project gives access to 100 free icons that can be integrated into your slides.


Example:
save image


Directions:
1. Add the add-on by clicking "Add-ons" and selecting "Get add-ons"
save image
2. Search for the "Noun Project" and install the add-on.
save image
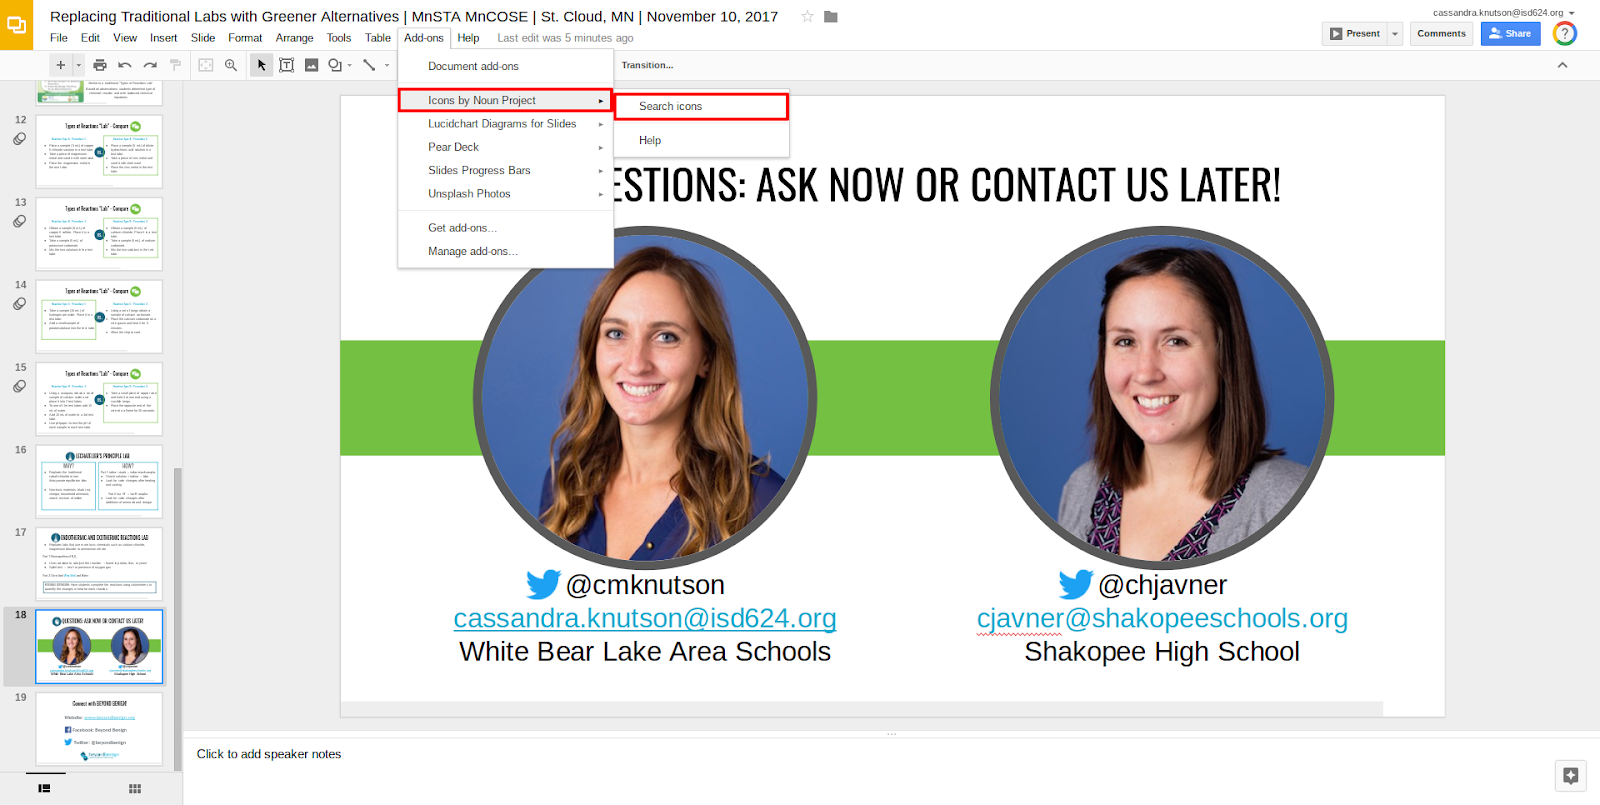
3. Open the add-on by clicking "Add-ons" and selecting "Icons by Noun Project" and "Search Icons."
save image
4. The icons displayed when the add-on opens are the free icons. Choose an icon and a color and click "Insert Icon" to add the icon to your presentation.

Unsplash Photos
Unsplash Photos gives access to beautiful background photos to integrate into your presentations.


Directions:
1. Install the add-on as done in the example above.


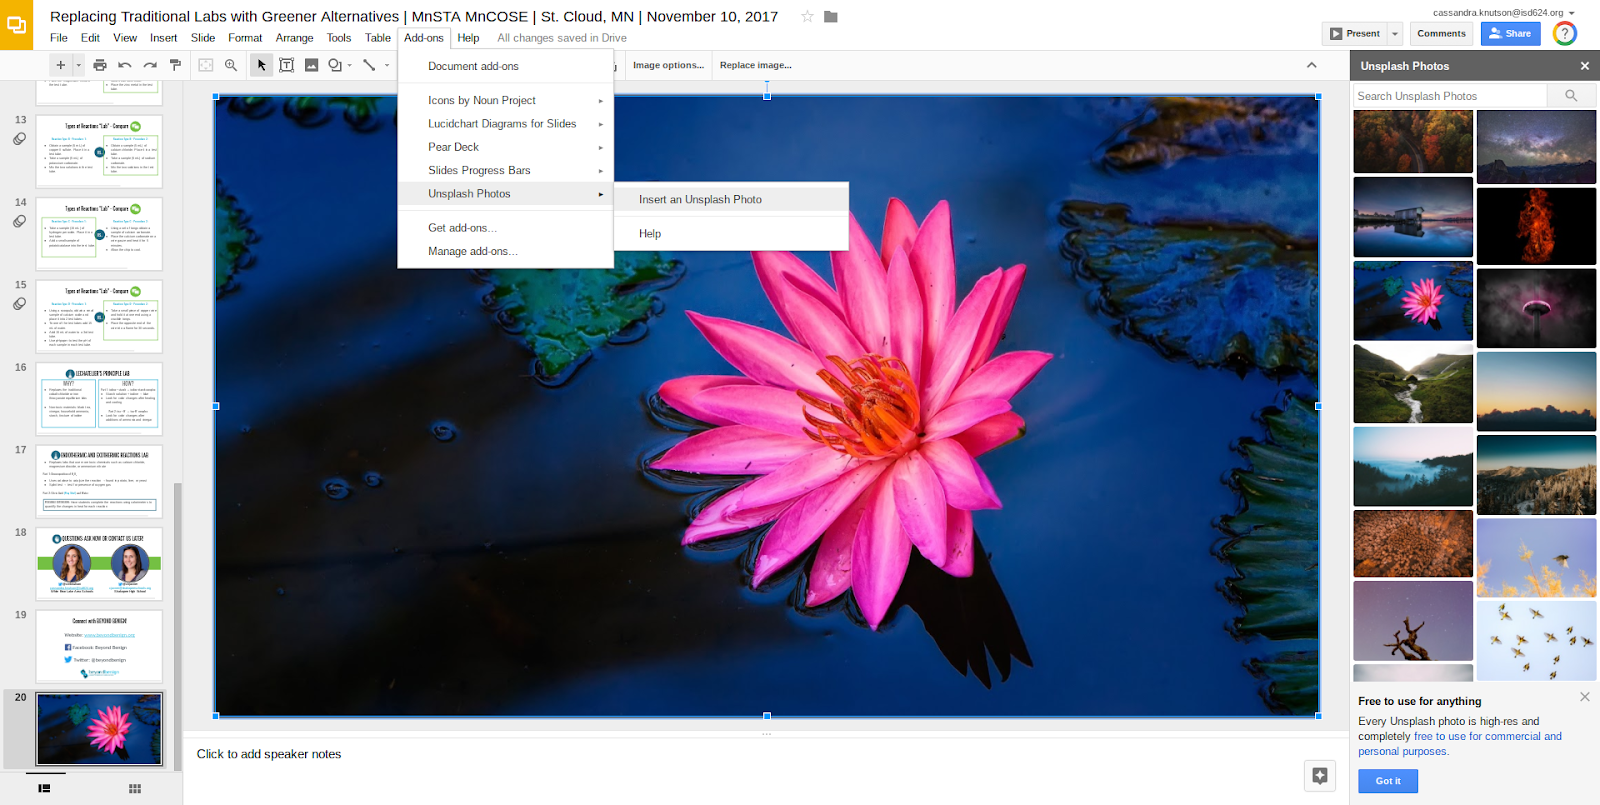
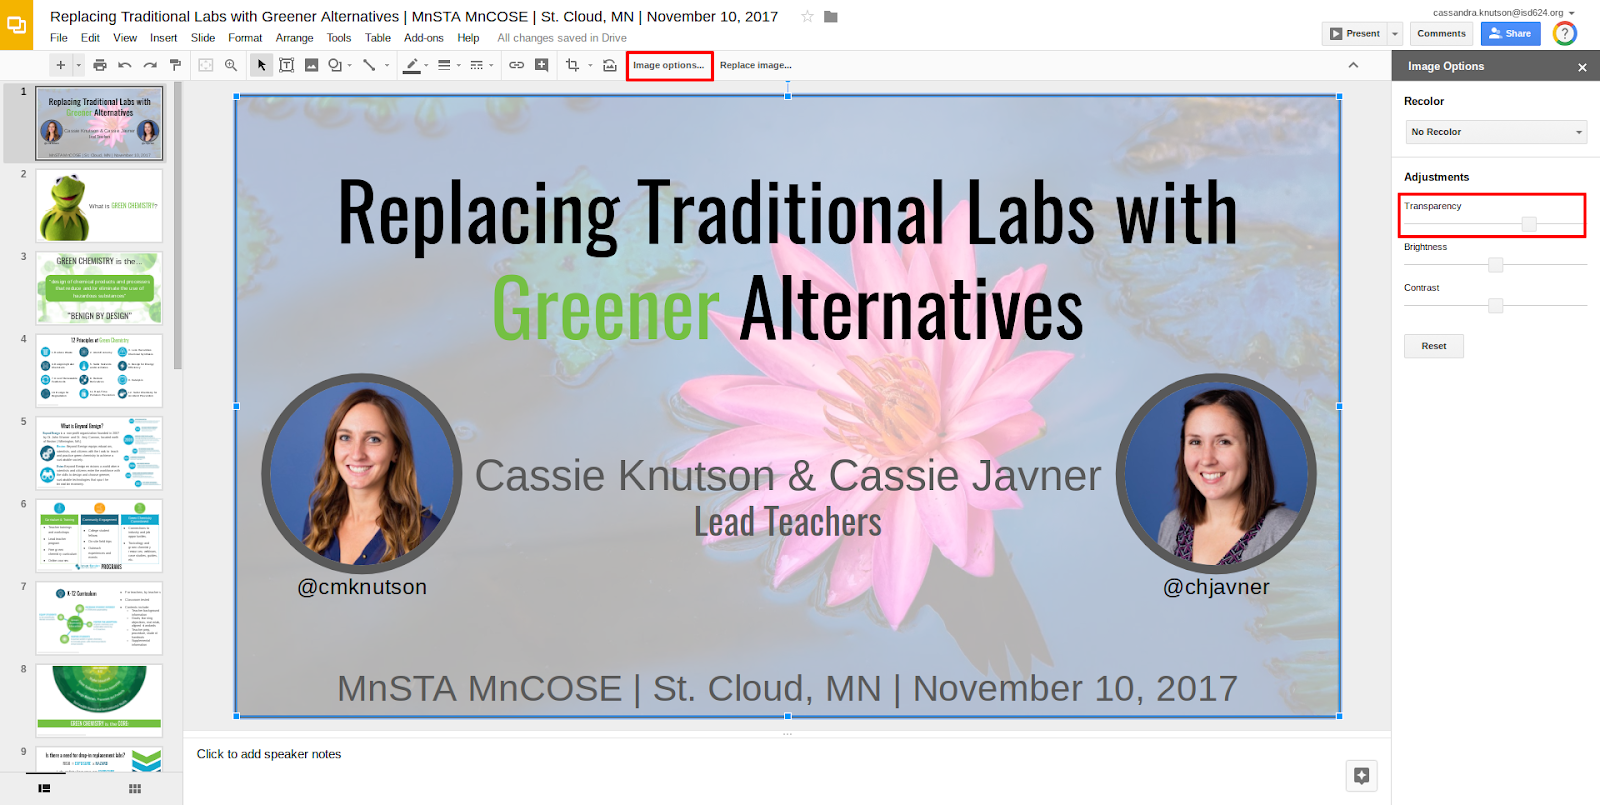
2. Open the add-on by clicking "Add-ons" and selecting "Unsplash Photos" and "Insert an Unsplash Photos." Select a photo to add it as your background.
save image


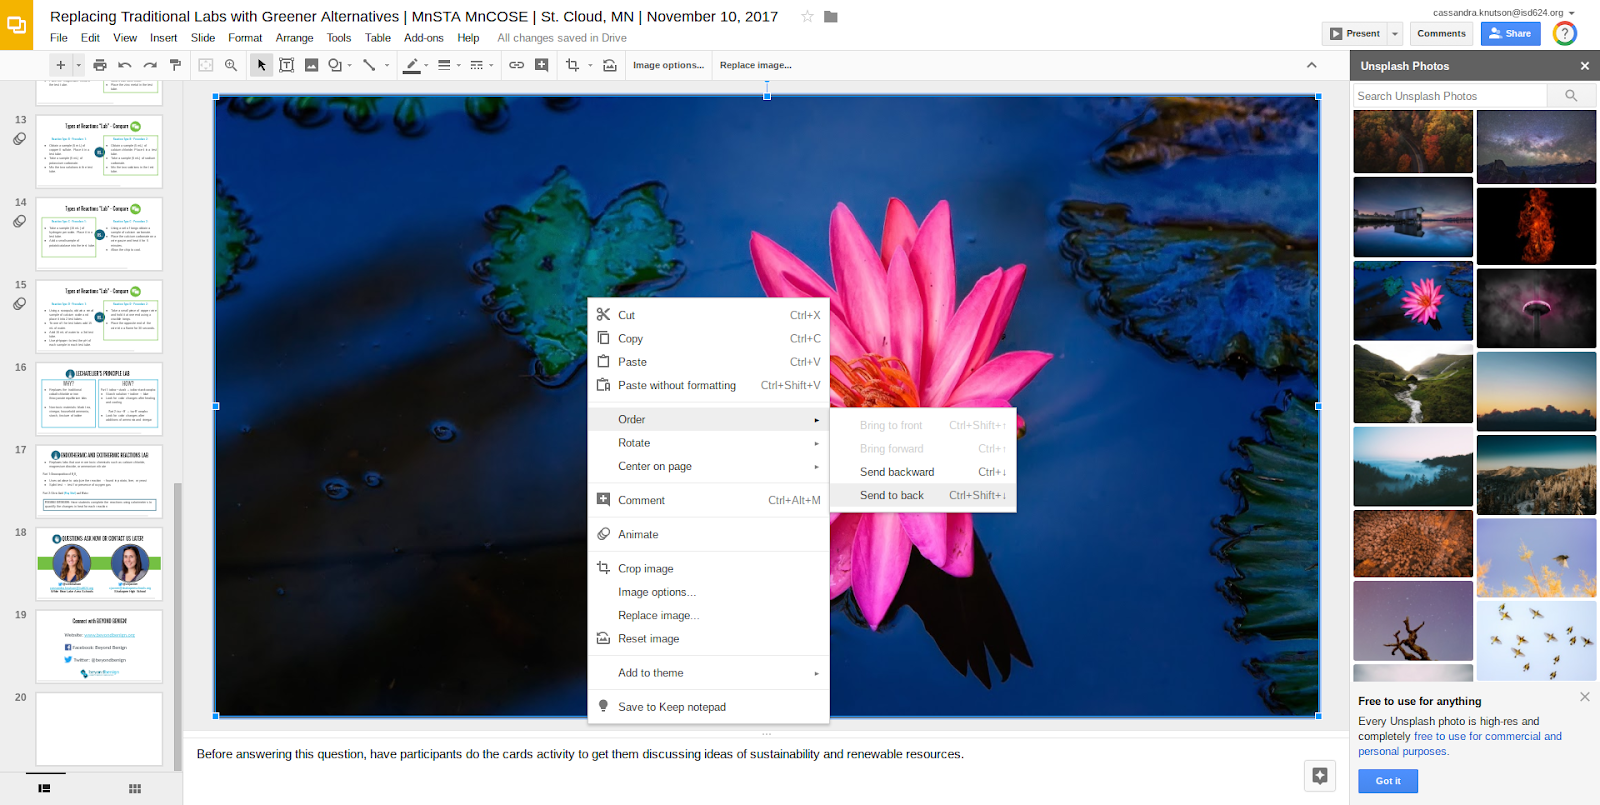
3. Right click the photo and order the photo to the back of slide.
4. You can use the image options to make the image more transparent.
Replacing Traditional Labs with Greener Alternatives   MnSTA MnCOSE   St. Cloud  MN   November 10  2017   Google Slides.png